
Starting with Kubernetes in production does not need to be expensive. With some flexibilization, you can publish your first k8s apps in production, spending only around 8 dollars monthly.
I will show you in this article, step by step, how you can leverage a cheap (but reliable) VPS hosting to create a single node K8s cluster and start to publish your apps professionally.
It is not a perfect solution, we need to be flexible and to have some intelligent decisions to make it work, but you can create a solid foundation, and, being careful with a few points, you can extract the most value from this infrastructure.
What are the concessions I need to make to use this cheap solution?
Unmanaged System
Well, first of all, it is unmanaged. If you are familiar with the services of big clouds like Amazon, Google, and Microsoft, you know they manage your Kubernetes cluster for you. And, of course, it has a cost, sometimes not so visible.
In the solution proposed here, you will be in charge of everything, you are “renting” a virtual machine, and every aspect of Kubernetes configuration administration and backup is up to you.
You will need to be conservative in resource usage.
Although I selected here one of the best options in terms of resources for this project, we still want to stick with the budget, which means we are getting limited resources for our cluster.
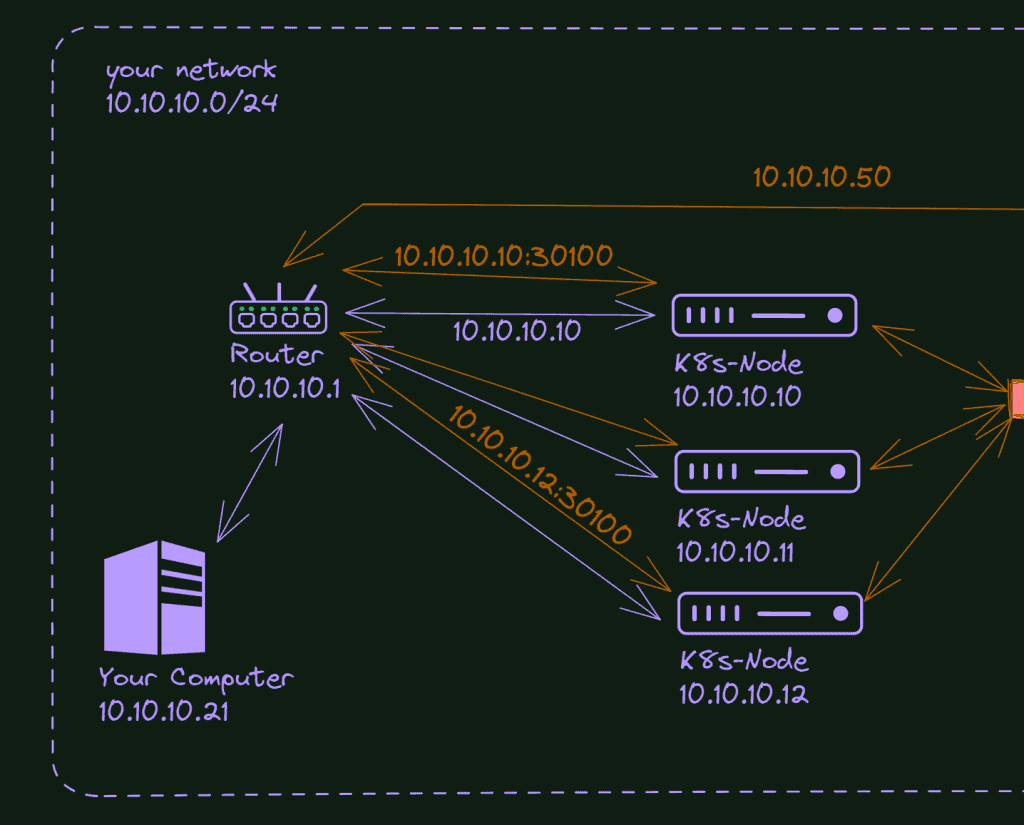
Because of this scenario, we need to be flexible here. For example, We will create a single node cluster, which blocks us from having any HA (High Availability) configuration; we still can have some on the pod level, but not at the node.
We also will use K3s instead of kubeadm with all the resource-saving options it comes with (like using SQLite instead of etcd). It’s a similar solution to what I showed you in the article about my Raspberry PI Cluster.
Backups are up to you.
As a non-managed service, it’s up to you how you want to configure the backup of your cluster and apps. Most of the VPS providers allow you to snapshot your server at least once per day. It would be enough for most projects, especially under this tight budget.
Limit speeding or trafik
Most affordable VPS have a limit in speed or traffic, and some can charge you extra money automatically when your site exceeds these parameters.
Again, the idea is to have a start, and as soon your business grows, and you need more band or more speed, you can jump to bigger plans or even to a different provider.
Not all VPS are the same.
Beyond the price and resource information, which is easy to find on the providers’ page, all providers, at one level or another, have hidden configurations and technical constraints that can ruin your cluster installation.
Unfortunately, there’s no easy way to figure it out, and this process is more on the trial and error level.
I tried many of them; some didn’t even allow me to spin up a Kubernetes cluster. The ones that allow that have some drawbacks as well. Narrowband, limited speed, private networks made impossible (you will need that if you want to expand your cluster with more nodes), poor performance, instability of the hardware, and so on. We need to be realistic; there’s no free lunch, and if we are using a service at a low cost, it needs to be cut from somewhere.
The best service I could find was a German host called Contabo.
Contabo pros and cons
Pros
The resources are impressive. For around eight bucks/mo, you can get a virtual server with 4 CPUs, 8GB of memory, and 50GB of NVMe disk (they are really good). You can replace this with 200GB of SSD if you prefer space over speed. Besides that, occasionally, they have a promotion increasing some of these resources for the same price. (I got one time double of the disk for free).
For comparison, if you get the same hardware at Digital Ocean, you must pay $48.
Besides that, the hardware quality is good enough. You have no idea of the outdated hardware you can find out there. Contabo is not the best; it also uses old hardware, but not ridiculously old. Anyway, I ran tests, side by side, with Amazon, digital ocean, and Contabo VPS, and the difference was not that big. Part of the disadvantage of the cloud is that you never know what hardware you are using, but this is a subject for another post.
Cons
Again, cheap VPS plans always have drawbacks; there’s no free lunch. I believe the most significant drawback is the plan speed. This initial plan is limited to 100MB. This speed grows along the more expensive plans. I had production sites published on this VPS and didn’t notice a speed difference, but it is because the traffic of these sites I tested is not massive. A clause in the site says it will not limit your speed in peaks unless your site passes the threshold for more than 10min. So, probably in my case, I never saw this limit being applied.
Another drawback is the setup cost; you must pay an extra month for the current plan when you sign up for it. It was a practice used a lot in the past, and honestly, Idk why Contabo still uses it, probably to compensate for the low value for loyal customers.
What Kubernetes Distribution to Choose?
There are a few ways to install k8s, from the manual installation via kubeadm to some “distributions” that install everything you need.
In this case, we need two characteristics that make K3s a perfect choice: Single node and Lightweight.
K3s changes
I like what they did to create a custom Kubernetes installation slim, with only the resources you need, and at the same time, flexible enough if you want to change parts. Kudos to the guys at Rancher.
Other installations also worked in Contabo, although you may need some adjustments to allow applications to be installed into the control-plane node depending on the install method.
What are we doing in this lab?
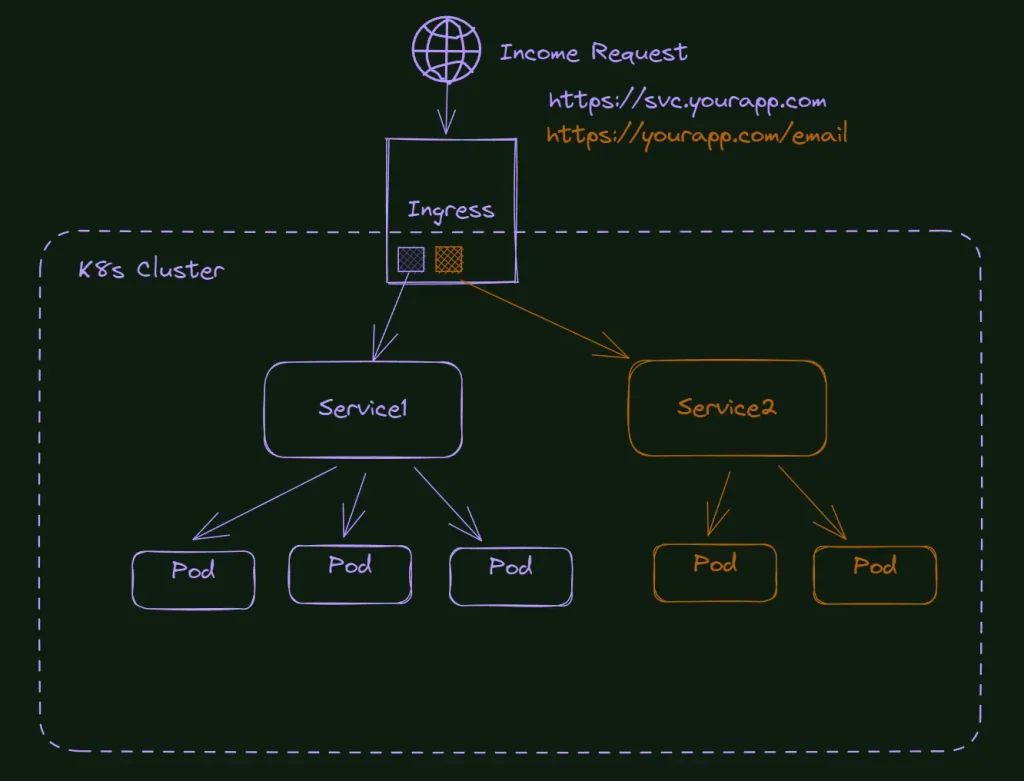
At the end of this lab, we will have a fully working Single Node Kubernetes Cluster, running Load Balancer, Traefik to take care of the ingress configurations, Cert Manager to handle the TLS (https), and Let’s encrypt as certificate issuer.
As we are using only one node here, there’s no reason to be concerned with shared storage like NFS; instead, we will use the local server (node) disk. When you want to expand this to more nodes, consider a shared solution like the one I wrote in this article: How to use NFS in Kubernetes Cluster: Step By Step.
What do I need to follow this tutorial?
First, you will need a domain; anyone will work here. You can find cheap alternatives at Namecheap if you don’t have one.
Also, you will need an account on Contabo. You can also use any other cheap server to try the tutorial – do a Google search for cheap VPS. Although I do not guarantee it will work, as I said before, I tried different servers that did not work as expected.
Essentially, that is what you will need (for this tutorial) a domain and an account on a VPS server.
Installing K3s
K3s includes an easy-to-use script to install all the infrastructure in the distribution. It also includes MetalLB (load-balancer) and Traefik (already in version 2).
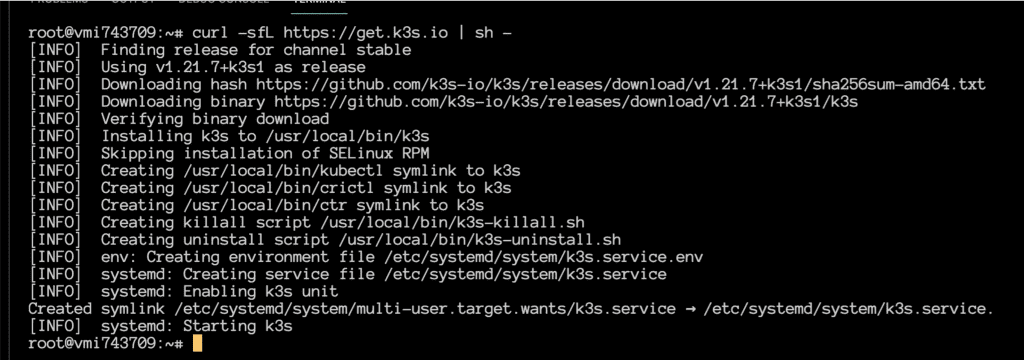
What you need to do is log (ssh) into your VPS and run this command:
curl -sfL https://get.k3s.io | sh -Pay attention that it executes the K3s script into your VPS; if you want to be careful and examine it first, you can download it and read it before the execution.
Before leaving the ssh, we only need to copy the Kubernetes configuration, and then we can access it remotely via kubectl
The K3 installation stores the configuration in the folder /etc/rancher/k3s.
Let’s check it:
cat /etc/rancher/k3s/k3s.yaml
If you do not have any other Kubernetes configuration in your local machine, you only need to copy it to your ~/.kube folder, changing the server address from 127.0.0.1 to your VPS IP.
Just one last thing, before exiting the ssh terminal, create the shared folder: /shared/demosite and put some index.html there. It could be a single text created by a command like:
sudo mkdir /shared/demosite
echo "demosite, testing..." > /shared/demosite/index.html
To test the cluster configuration, exit from your ssh connection and run kubectl to get nodes from your local machine.

Persistent Volumes
It is unnecessary here, but as you will need it in the future for any serious work, let’s configure it as a “proof of concept.”
To use volumes in Kubernetes, you need two configurations: The persistent Volume and a Claim (PVC). You can use storage classes to submit your claim and create PVs automatically in more advanced cases. I explain it a bit more in my article about NFS configuration;
All the YAML files used in this article can be found on GitHub: https://github.com/fabiofernandesx/VPS-K8s
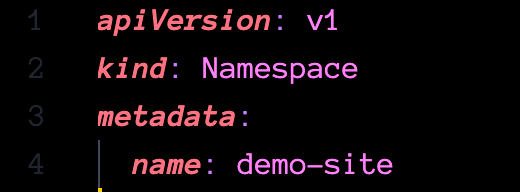
Let’s start with the namespace; it’s always a good practice to isolate everything you can in specific namespaces, it’s more organized, and it’s super easy to remove everything with only one command.

Then let’s create the PV


And the PVC
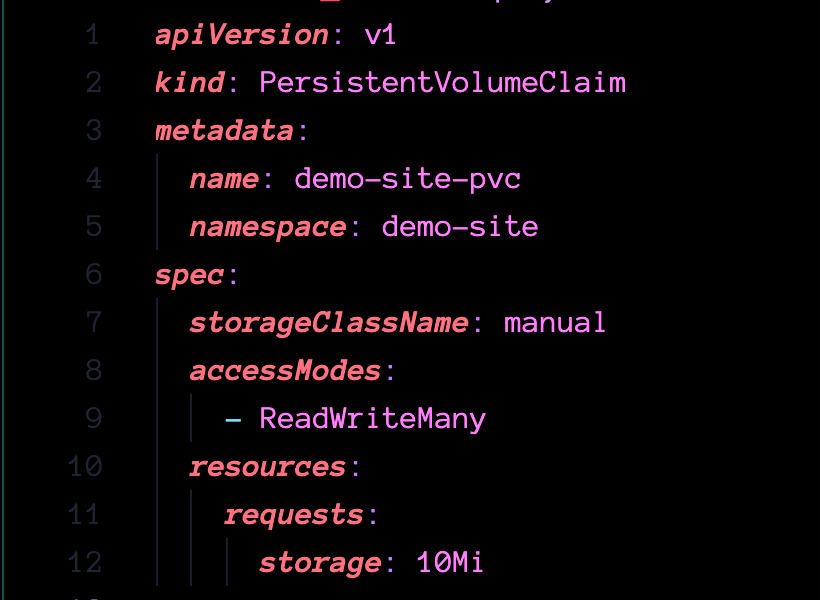

Check if everything is there and done here.

How to install and configure CertManager to handle the site certificates (https)
Last step before deploying our website. I want to deploy it with a professional feeling, and nowadays, there’s no reason to deploy anything without security.
We will use Let’s Encrypt here, but instead of using it directly, I will install a CertManager service in our cluster. There are some advantages to doing that, but one is that your certificates are stored as secrets in the cluster instead of files on the local disk.
So, let’s start it.
I will apply the YAML directly from the project in GitHub. Depending on when you are reading it, the versions can be different:
kubectl apply -f https://github.com/jetstack/cert-manager/releases/download/v1.6.1/cert-manager.yaml
It will create a few things in our cluster. Please, be patient and wait for everything to be completed before proceeding.

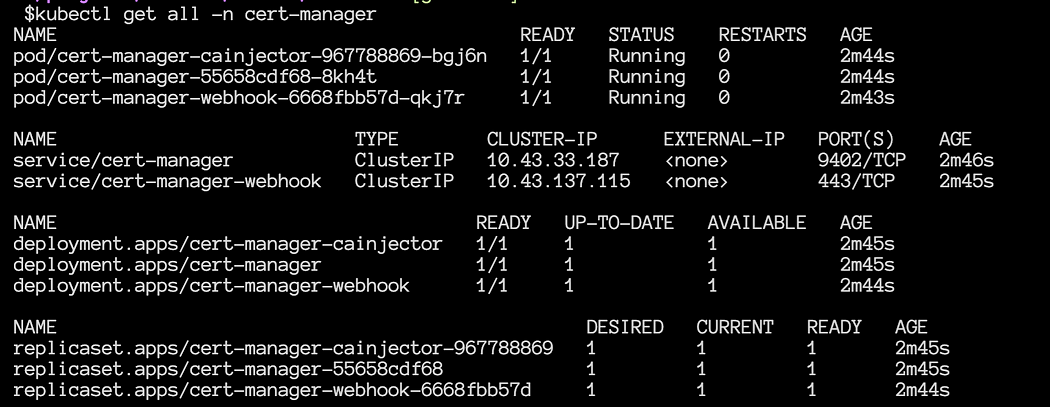
You can check if everything is running with the command:
kubectl get all -n cert-manager
The next step is to tell CertManager we want to use Let’s Encrypt to generate the certificates. To do that, we need to create a different object in our cluster, a ClusterIssuer:
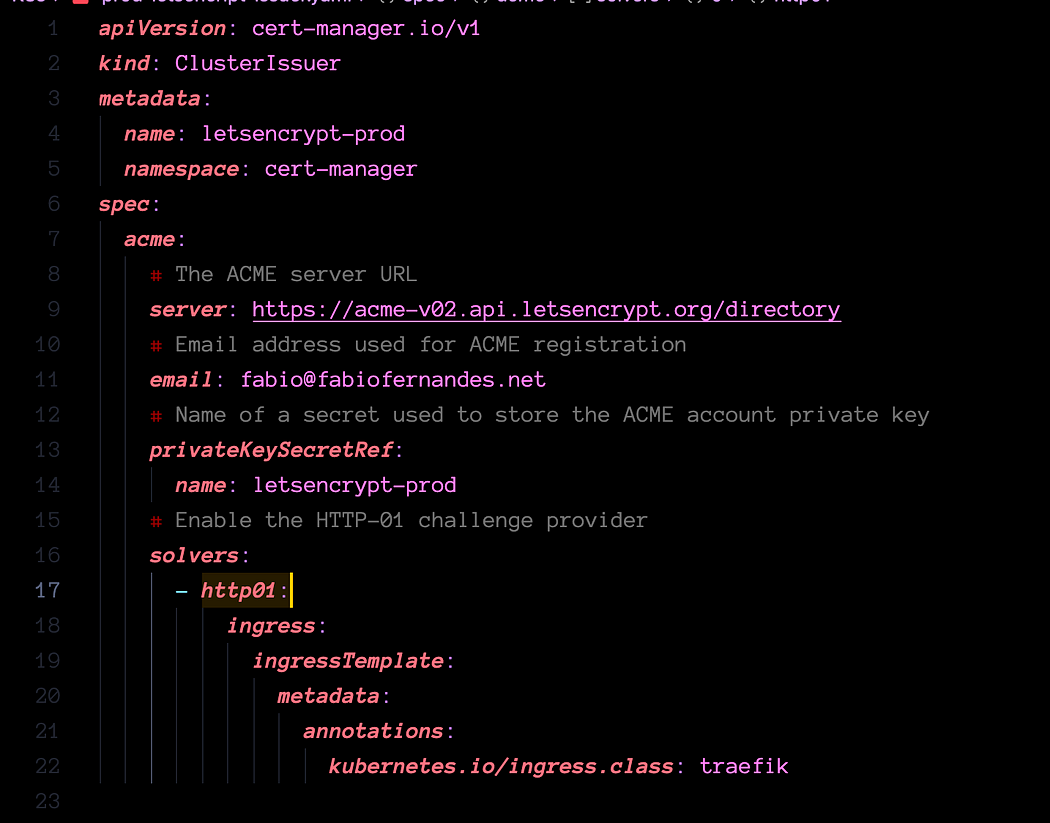
The only thing you need to change in this file is the email for Let’s Encrypt; everything else is ready.

You can verify the issuers with the command:
kubectl get clusterissuers
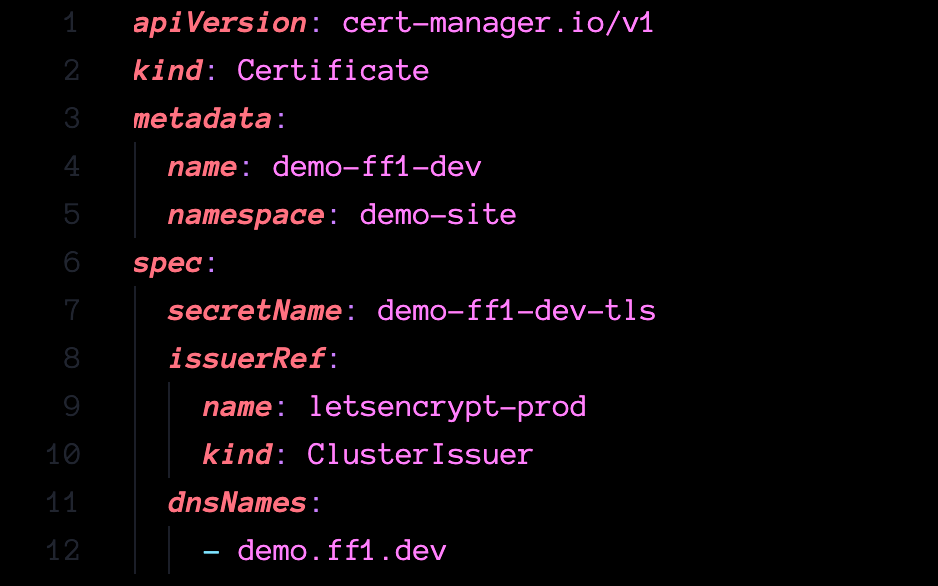
Now, let’s create a certificate for our demo site
You need your domain to point to your VPS IP to make it work. Ideally, any subdomain should redirect to this IP.
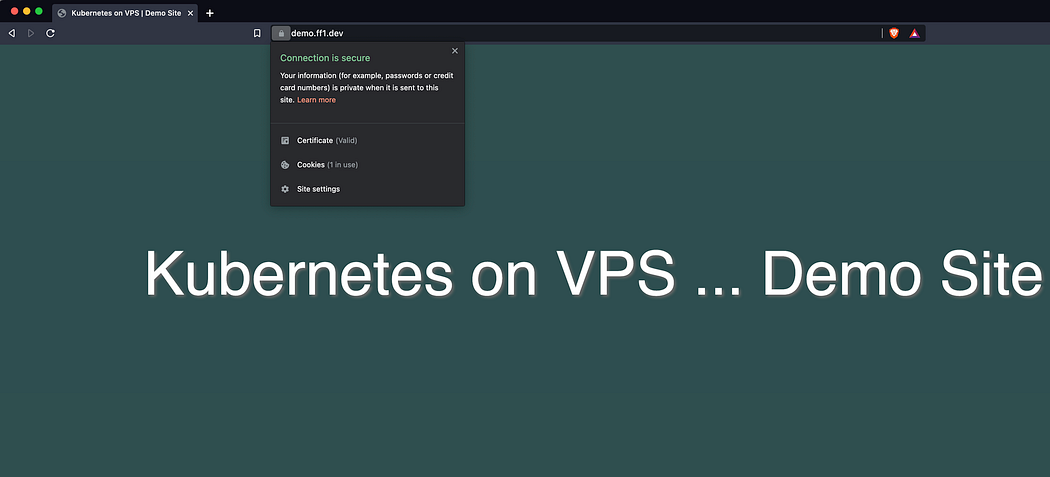
I will use my dev domain here (ff1.dev) and create a subdomain only for this example (https://demo.ff1.dev)
Here is the YAML file:
Again, wait until your domain/subdomain points to the VPS IP address before applying this configuration.

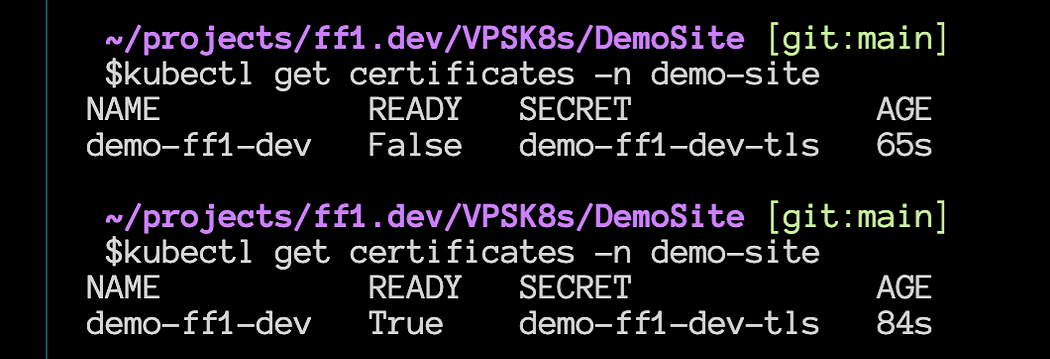
You can check the certificate with the command below (the ready state should pass from False to True):
kubectl get certificates -n demo-site
What do I need to deploy the website?
We already have the certificates and the persistent volumes created. Now everything we need to publish our website is the Deployment (that contains the nginx image and our custom configuration), the service to expose this image to the world, and the ingress to define the route for the service.
If all of it is weird for you and does not make sense, look at the article I wrote about Kubernetes Network, it can clarify things a bit.
Let’s start with the deployment file.
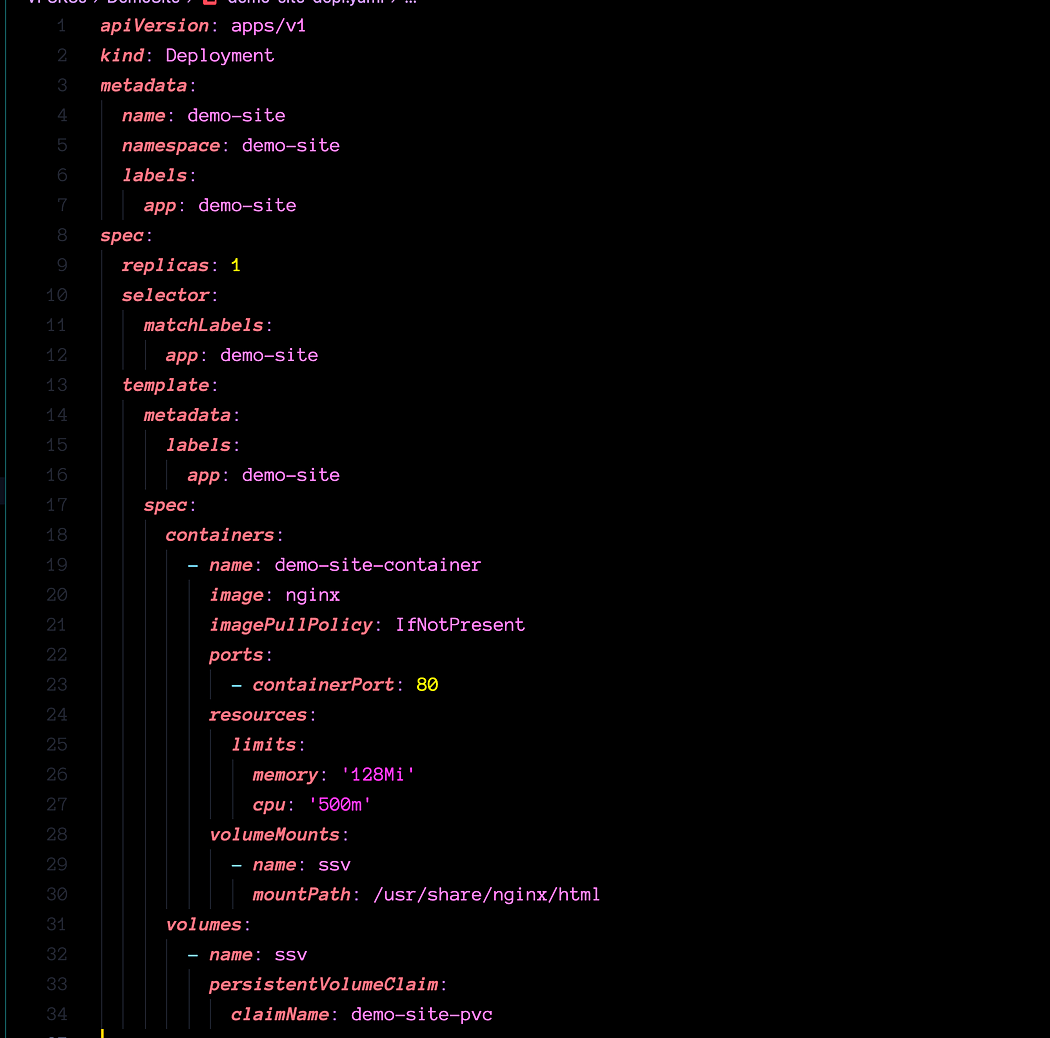
Nothing fancy here, a deployment configuration with one replica of an Nginx container using the persistent volume claim we created before.
Service file, again, nothing special, plain and old TCP service to our cluster:

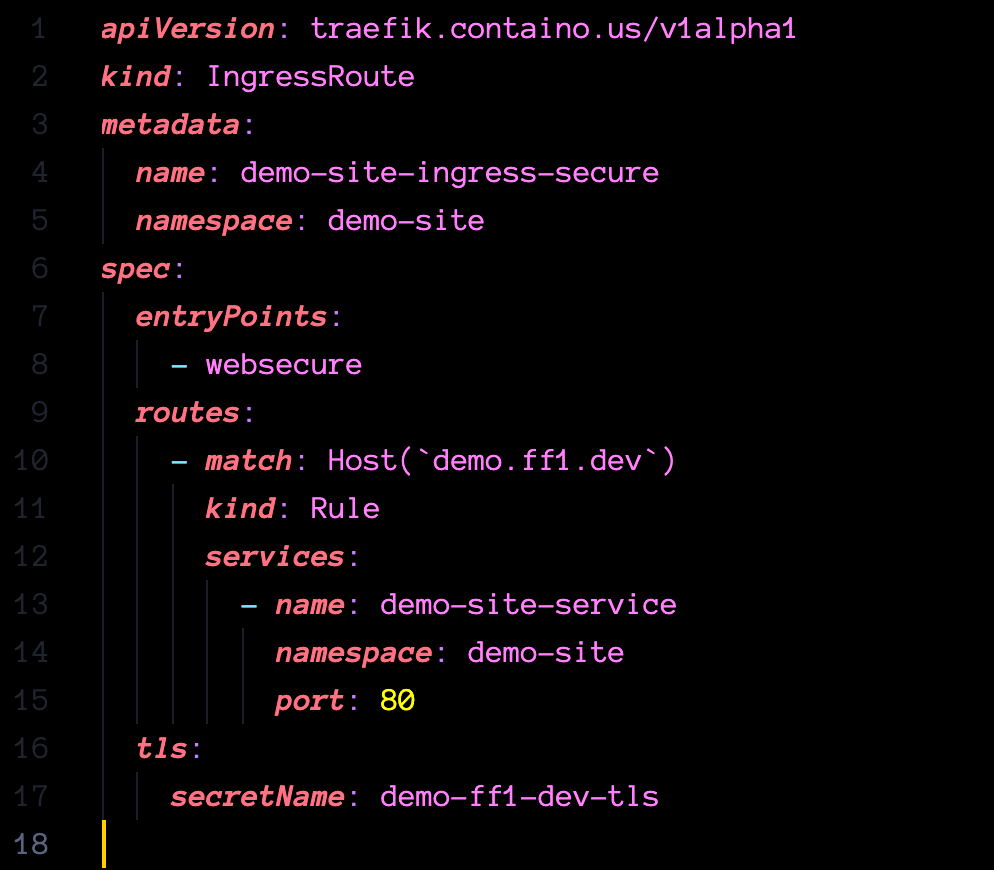
And finally, the ingress file to wrap it up. Be careful with the ` (backslash) in the hostname; it’s not a single quote.
Apply everything and verify if it’s running without errors:
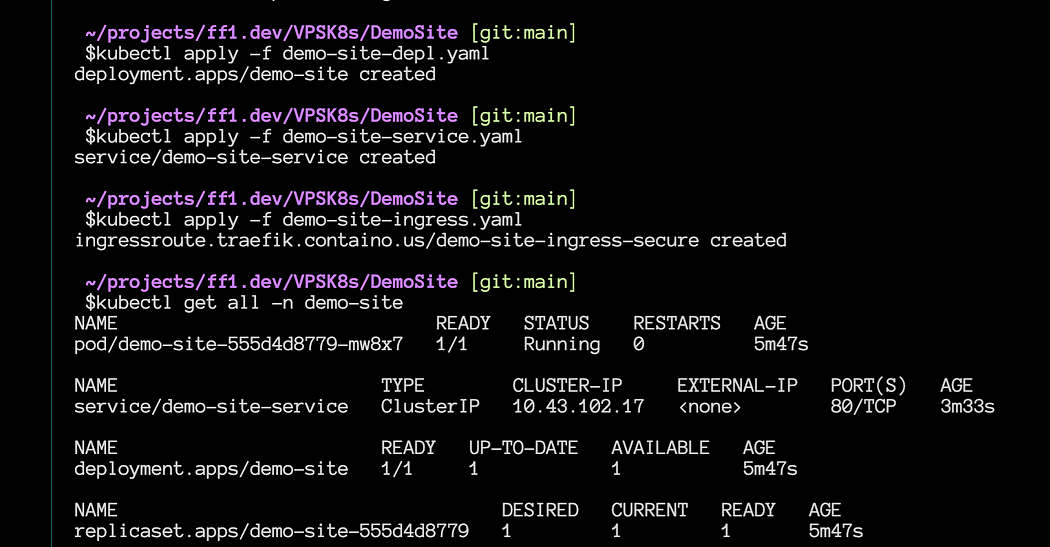
And that’s it… Your site should be accessible via browser:
Conclusion
In conclusion, this article tries to help individuals seeking a cost-effective solution for hosting their applications. However, it is essential to consider the concessions that may come with this cheap solution. Firstly, the hosting service is unmanaged, meaning you will be responsible for managing and maintaining the system. This requires a certain level of technical expertise and the ability to troubleshoot issues independently. Additionally, resource usage needs to be conservative as there may be limitations on the available resources at this affordable price point. Backups are also not included, so taking responsibility for implementing a backup strategy to protect your data is crucial. Lastly, there may be limitations on speed and traffic, which could impact the performance and scalability of your applications.